I wanted a way to graph the temperatures of my home brew and throw alarms at me if it goes out of the bounds. I know that’s not RDWHAHB, but I figured it’d be a fun project anyway.
So I settled on 1-wire as my sensing network. The beauty of 1-wire networks is their simplicity. Each device on the network has a unique ID. Then all you need is a ground and a data line. Since the temp sensor I used can work off parasitic power, I don’t need a third voltage line. So the software just does a query for the temps of all sensors and they start spitting out their unique id and the value. Pretty awesome.
I grabbed a couple of Dallas DS18S20 IC temp sensors and a Dallas DS9490R USB adapter. The adapter takes in RJ11 (really only two wires) and converts it to USB. The usb adapter is plugged into an old laptop running Ubuntu 11.10 and digitemp. On top of digitemp I have another software package called dtgraph making it oh so very pretty. More about how all these work and how to set up later. But first a few pictures!
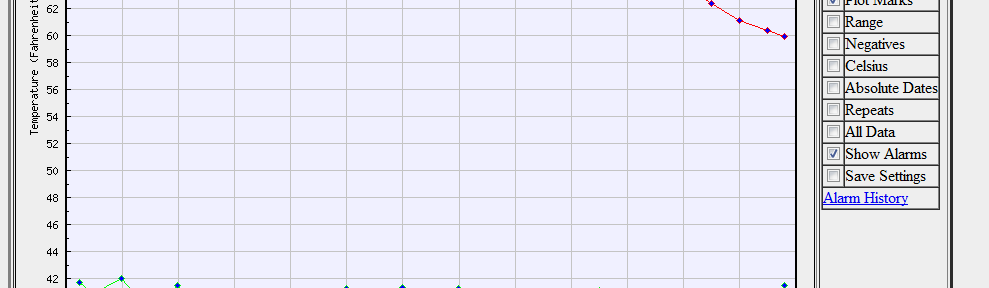
Here is what the graphing system looks like. I have mine to log every 15 min. Below we’re seeing 13 hours with all three sensors. Notice that you can see when the fridge turns on and off. Nice!

Here I’ve set it to view 28 days. Again this logging every 15min and you can see that it captured 2,565 temperatures. It’s only showing 726 of them to save on render time. You can make it show all if you check the Repeats and All Data. Renders pretty fast on my 10 year old laptop.

Here’s the size of the mysql database after logging every 15 min for 29 days.
root@jdrews-M2Ne:/var/lib/mysql/digitemp# du -h
256K
So really not too bad.
Here’s what the DS9490R 1-wire to USB adapter looks like plugged into my laptop

I have the beige RJ45 cable coming out of the DS9490R going into a 5 RJ11 breakout box as shown below.

All three cables have DS18S20 sensors at their ends. The grey cable is a telephone cable I hacked up and the blue ones are standard cat5 cables that I crimped a RJ11 onto the end. All you really need are two cables — data and ground. If you’re running really long cables you might need a voltage line, but if it’s less than 30-40ft you should be good.
Enough talk here’s the sensor taped onto my carboy. Got a American Pale Ale on the way!

And here’s one going into my refrigerator. I stripped back the insulation and extra wires to make the cable smaller. It seals pretty well like this as the cables are fairly small. One day I’ll drill a hole and caulk. Right now it’s taped up with electrical tape. We shall see how well that handles the cold.
Also note that there are 4 wires gong in, but I’m actually only using 2. The white ones just keep the sensor hooked onto the tray, and consequently centered in the middle of the fridge.

Here’s the outside sensor. I was able to slip it under the window sill and shut and lock the window. Make sure you put it in the shade or it might tell you it’s 138F outside. 😉 This part of the house stays shaded all day.

I wrapped it in a small plastic ziplock and then sealed up the end of the ziplock with more electrical tape. Then I sealed it up again with a rubber band. Close up below.

Hardware Setup
Now to the hardware details. If you’re just dealing with parasitic power (i.e. no Vdd line) you’ll just need two wires, data and ground. The DS18S20 has three pins as seen below

Taken from the DS18S20 Datasheet @ Maxim
So for parasitic power you’ll solder the GND to Vdd. Grab a CAT5 cable and strip down two wires (I used orange and green). Solder a line on your CAT5 to the GND+Vdd and another line to the DQ (data line). Pay attention to your colors.
Now on the other end you’re going to crimp the CAT5 into a RJ11 (this is your standard telephone line). I don’t suggest using a telephone line as the wires are so thin that my solder gun burned through them (grr!).
Below is the diagram for your crimped RJ11.

Above chart taken from the DS9490R Datasheet @ Maxim
You’ll be just using 3 and 4, where 3 is the Data line and 4 is the GND line in a parasitic power setup. They call it 1-Wire Data and 1-Wire Return on the chart.
Crimp the RJ11 on there and that’s it. You’ve got a temperature sensor ready to slap on your carboy.
Software Setup
Now to setting up the software. I used digitemp combined with dtgraph. Digitemp pulls the data from the sensors. DTGraph pushes the data into a mysql database and handles the php website.
I used Ubuntu 11.10 for this but it should work for other Ubuntu versions. First up grab a copy of digitemp via apt-get
sudo apt-get install digitemp
Now we need to see if your usb adapter can see your sensors. Run the following and you should see the sensors on your network. -w means walk the network.
root@jdrews-M2Ne:/home/jdrews# digitemp_DS2490 -w
DigiTemp v3.5.0 Copyright 1996-2007 by Brian C. Lane
GNU Public License v2.0 - http://www.digitemp.com
Found DS2490 device #1 at 002/002
Turning off all DS2409 Couplers
.
Devices on the Main LAN
103C017C02080025 : DS1820/DS18S20/DS1920 Temperature Sensor
107CD17B02080088 : DS1820/DS18S20/DS1920 Temperature Sensor
10E3ED7B020800B8 : DS1820/DS18S20/DS1920 Temperature Sensor
815ADA30000000E0 : Unknown Family Code
Not sure why I always have a device called ‘Unknown Family Code’ but it still works.
Now let’s set up the .digitemprc config file.
digitemp_DS2490 -sUSB -i
This should create a .digitemprc file in your local directory. Mine looked like this:
TTY USB
READ_TIME 1000
LOG_TYPE 1
LOG_FORMAT "%b %d %H:%M:%S Sensor %s C: %.2C F: %.2F"
CNT_FORMAT "%b %d %H:%M:%S Sensor %s #%n %C"
HUM_FORMAT "%b %d %H:%M:%S Sensor %s C: %.2C F: %.2F H: %h%%"
SENSORS 3
ROM 0 0x10 0x3C 0x01 0x7C 0x02 0x08 0x00 0x25
ROM 1 0x10 0x7C 0xD1 0x7B 0x02 0x08 0x00 0x88
ROM 2 0x10 0xE3 0xED 0x7B 0x02 0x08 0x00 0xB8
You’re gonna want to copy this somewhere safe so you don’t overwrite it. I put mine in /home/jdrews/digitemp/digitemp.conf
Now let’s read some temps!
jdrews@jdrews-M2Ne:/home/jdrews/digitemp# digitemp_DS2490 -a -c /home/jdrews/digitemp/digitemp.conf
DigiTemp v3.5.0 Copyright 1996-2007 by Brian C. Lane
GNU Public License v2.0 - http://www.digitemp.com
Found DS2490 device #1 at 002/002
Apr 09 21:35:07 Sensor 0 C: 4.44 F: 39.99
Apr 09 21:35:08 Sensor 1 C: 21.75 F: 71.15
Apr 09 21:35:09 Sensor 2 C: 16.88 F: 62.38
Ok so now that we have some temps let’s start setting up the UI: dtgraph. Grab the latest tarball off http://sourceforge.net/projects/dtgraph/
Mine was dtgraph-0.4m.tar.gz. Untar it
tar -xvzf dtgraph-0.4m.tar.gz
In this file is an INSTALL doc that is pretty straight forward. I’ll walk you through the basics.
You’ll need a LAMP server. Install it with apt-get
sudo apt-get install mysql apache2 php5
For 12.04 LTS the above line looks like the following
sudo apt-get install mysql-server mysql-client apache2 php5
You’ll also need some mdb2 drivers and jpgraph
sudo apt-get install libphp-jpgraph php-mdb2 php-mdb2-driver-mysql
Ok now that we have the reqs down lets set up the mysql database to hold our temps. In this case my database is called stats.
mysqladmin create stats
Then use dtgraph’s scripts to create the structure in your new database.
mysql -u  -p stats < mysql_create_digitemp_metadata.sql
mysql -u  -p stats < mysql_create_digitemp.sql
mysql -u  -p stats < mysql_create_digitemp_alarms.sql
If you get a warning that looks like the following, just change your ‘TYPE=MyISAM’ to ‘ENGINE=MyISAM’. This is happening since we’re using a different version of mysql.
ERROR 1064 (42000) at line 6: You have an error in your SQL syntax; check the manual that corresponds to your MySQL server version for the right syntax to use near 'TYPE=MyISAM' at line 13
Now we’ll create a user for digitemp and grant it privileges to our new stats database. Log into mysql.
mysql -u root stats
And grant the rights to your new user, dt_logger
GRANT SELECT,INSERT,UPDATE ON stats.* TO dt_logger@localhost
      IDENTIFIED BY 'ChangeThisPassword';
So the database should now be setup. Lets get the website going.
Copy the contents of the ‘www’ folder in your dtgraph folder (the one we untar’d) to /var/www/dtgraph. You might need to create this folder. Feel free to name it something else if you want.
mkdir -p /var/www/dtgraph
cp -r www/* /var/www/dtgraph
Set the permissions on your conf.php to read and write. Group should suffice.
chmod g+rw conf.php
You’ll want to edit the conf.php and add in all your configuration info. Here’s the first half of mine with all the important changes. Pay particular notice to the digitemp_conf, the sql username and password, and the jp_path.
/************** Database Properties *****************/
/****************************************************/
$conf['driver'] = 'sql';

$conf['sql']['phptype'] = 'mysqli'; //mysql or mysqli, etc

// What protocol will we use to connect to the database.  The default
// is tcp, but if you wish to use UNIX sockets, change it to 'unix'.
$conf['sql']['protocol'] = 'tcp';

// If you are using UNIX sockets, you may need to specify the socket's
// location.
// $conf['sql']['socket'] = '/var/lib/mysql/mysql.sock';

// What port is the database server running on? Not required for all
// databases.
// $conf['sql']['port'] = 5432;

// What hostname is the database server running on, or what is the
// name of the system DSN to use?
$conf['sql']['hostspec'] = 'localhost';

// What username do we authenticate to the database server as?
$conf['sql']['username'] = 'dt_logger';
// What password do we authenticate to the database server with?
$conf['sql']['password'] = 'YOURPASSWORDHERE';

// What database name/tablespace are we using?
$conf['sql']['database'] = 'stats';
//Main table name that digitemp_mysql.pl logs to
$conf['sql']['table'] = 'digitemp';
//Metadata table describing available sensors
$conf['sql']['table_meta'] = 'digitemp_metadata';
//Alarms table describing raised/old alarms
$conf['sql']['table_alarms'] = 'digitemp_alarms';
// What charset does the database use internally?
$conf['sql']['charset'] = 'iso-8859-1';

/********************* LOGGER **********************/
/****************************************************/
// This is for the script that will insert current
// readings into the database (PHP version).
// This is optional - it is needed only if you logger.php (on cron)
$conf['digitemp_binary'] = '/usr/bin/digitemp_DS2490';
$conf['digitemp_config'] = '/home/jdrews/digitemp/digitemp.conf';

/************** JPGraph Properties ******************/
/****************************************************/

//The dir path under which jpgraph.php and others can be found
//This may be relative or absolute (filesystem, not url)
$conf['jp_path'] = "/usr/share/jpgraph/";
Ok now that that’s done let’s make sure you can see your webpage. Go to http://localhost/dtgraph (or whatever you named your folder). You should see the webpage. If not check to make sure apache and mysql are running. You could also see a blank page if index.php is not a default page type. If so go to http://localhost/dtgraph/index.php. Lastly start reading through the INSTALL file in dtgraph and see if there’s something we missed. 😉
Now lets set up the logging. I’m going to be using the logger.php that’s included with dtgraph. It pulls it configuration values from the conf.php file so as long as that’s set up correctly you should be able to run the following and get it to insert data into your digitemp database.
php /var/www/dtgraph/admin/logger.php
Now log into your mysql database and see if you have data. If all went well it should look like this.
root@jdrews-M2Ne:/var/www/dtgraph# mysql -u dt_logger -p stats
Enter password:
Reading table information for completion of table and column names
You can turn off this feature to get a quicker startup with -A

Welcome to the MySQL monitor.  Commands end with ; or \g.
Your MySQL connection id is 459
Server version: 5.1.61-0ubuntu0.11.10.1 (Ubuntu)

Copyright (c) 2000, 2011, Oracle and/or its affiliates. All rights reserved.

Oracle is a registered trademark of Oracle Corporation and/or its
affiliates. Other names may be trademarks of their respective
owners.

Type 'help;' or '\h' for help. Type '\c' to clear the current input statement.

mysql> select * from digitemp;
+-------+---------------------+------------------+------------+
| dtKey | time                | SerialNumber     | Fahrenheit |
+-------+---------------------+------------------+------------+
|     0 | 2012-03-16 10:45:02 | 107CD17B02080088 |      69.01 |
+-------+---------------------+------------------+------------+
1 row in set (0.00 sec)
Horray we have data! So let’s add some more datapoints by running the logger.php script a few more times. Now go look at your website again and you should see plot points. If not, you most likely have an issue connecting to the database. Check your conf.php and make sure it’s all correct.
Now it’s a good idea to password protect your admin folder if this is gonna be viewable from outside your network. You can do this with a simple .htaccess file sitting in the /admin folder. Refer to the tutorial here for more details: https://help.ubuntu.com/community/EnablingUseOfApacheHtaccessFiles
You set up the colors of your graph and the name of your sensors in the admin section. Here’s a helpful hint– Put your thumb and index finger on a sensor and watch the temp go up to figure out which is which.
http://localhost/dtgraph/admin/
Here’s how mine is set up.

You’ll notice I have alarms set for range and change amounts. To do this you’ll need to use sendmail or ssmtp (how I did it).
I’ll update this post later on how to set up ssmtp so your new fangled temperature monitoring system can send you alerts when your precious homebrew gets to warm/cold, or starts warming up/cooling down too fast.
That kicks ass.
Hi Jon,
I’m trying to setup Dtgraph according your instructions, bu the install fails at all three sql-scripts.
mysql -u <username> -p stats < mysql_create_digitemp_metadata.sql
mysql -u <username> -p stats < mysql_create_digitemp.sql
mysql -u <username> -p stats < mysql_create_digitemp_alarms.sql
with error like:
ERROR 1064 (42000) at line 8: You have an error in your SQL syntax; check the manual that corresponds to your MySQL server version for the right syntax to use near ‘(14) NOT NULL,
SerialNumber varchar(17) NOT NULL default ”,
Fahrenheit deci’ at line 3
Any clues here?
I’m using Ubuntu 12.04 and MySQL v5.5.29
Thx, Roger
Hey sorry it took me awhile to get back to you. Did you ever figure it out?
My first thought was there’s some sort of dos line ending problem. Try running dos2unix on the sql scripts. apt-get install dos2unix if you don’t have it.
I’m currently on 12.04 and 5.5.32 so that shouldn’t be the problem…
Thanks a lot for the info!
Your page gave me a starting point on what to look for. Although I ran digitemp on Mac and I had to use slightly different hardware.
Thank you!
Glad I could help out! I checked out your digitemp page. Pretty nifty!